
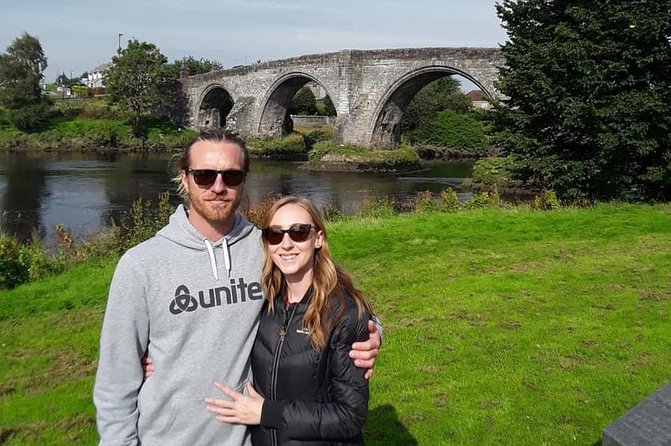
Reviewed · STIRLING TOURS
Braveheart (Battle of Stirling Bridge) Tour
Stirling Bridge is Scotland’s first big victory. This small-group tour turns a short walk by the River Forth into a clear story about William Wallace and Andrew de Moray, from their early rise to their lasting legacy after the 1297 fight. I like the small-group cap of 15 and the on-site focus at the Old Stirling Bridge area.
One thing to plan for: this is not a long hike. You’ll do some standing and looking at the ground and river edge, and it runs in good weather, so bring layers and be ready for wind.
In This Review
- Key things you’ll notice on this Stirling Bridge tour
- Why Stirling Bridge is worth your time (even if you’ve heard the movies)
- Where you start at Old Stirling Bridge, and what the timing really means
- Stop at Stirling Bridge: Wallace, Andrew de Moray, and the 1297 turning point
- Finding the original wooden bridge location, and why it’s harder than it sounds
- Standing on site without over-walking: what to expect physically
- Small-group feel: how a 15-person cap changes the experience
- Braveheart myths and the pleasure of correcting the record
- Guides you might meet, and what their teaching style feels like
- Price and value: $34.45 for an on-site history session
- Pair it with Bannockburn, or use it as your Stirling anchor
- Who should book this tour, and who might want a different option
- Should you book? My take
- FAQ
- How long is the Braveheart (Battle of Stirling Bridge) Tour?
- What is the group size for this tour?
- Where does the tour meet?
- What language is the tour offered in?
- Is there an admission ticket for the main stop?
- Does the tour run in bad weather?
- What is the cancellation policy?
Key things you’ll notice on this Stirling Bridge tour
- Max 15 travelers for questions and back-and-forth, not a lecture from far away
- A River Forth meeting point right by Stirling Old Bridge so the geography feels real
- William Wallace and Andrew De Moray explained as people, not just names in a book
- The original wooden bridge location gets mapped and discussed, even though little physical trace remains
- Movie myths get challenged, including Braveheart-related inaccuracies
- Around 1 hour to 1 hour 15 minutes that fits neatly into a busy Stirling day
Why Stirling Bridge is worth your time (even if you’ve heard the movies)
Stirling Bridge sits at an early, turning-point moment in the Wars of Independence. Before Bannockburn steals the spotlight, this is one of Scotland’s first major wins in that long struggle, and the story sets up why Wallace and Andrew de Moray mattered so much.
What I like about tackling this battle in Stirling itself is that the terrain does the talking. When you’re standing near the river and hearing how the wooden bridge factored into the fighting, the history stops feeling abstract.
Other Stirling days worth a look:
- Stirling Old Town Daily Walking Tour (11am & 2pm)
★ 5.0 · 279 reviews - Bannockburn Battlefield Tour
★ 5.0 · 36 reviews - 3 Hour Private Tour of Stirling Old Town and Stirling Castle
★ 5.0 · 17 reviews
Where you start at Old Stirling Bridge, and what the timing really means
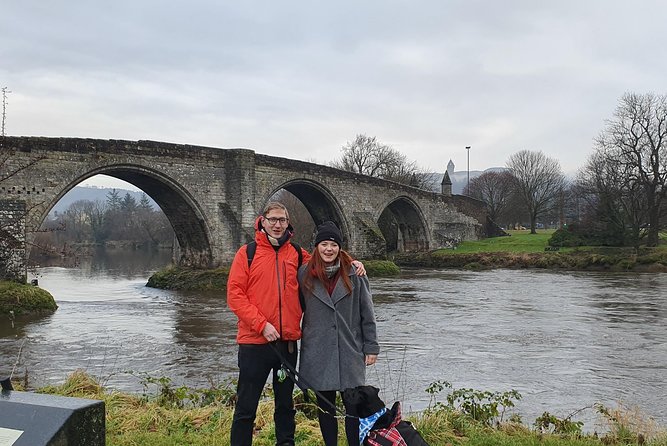
Your meetup is at Stirling Old Bridge by the River Forth (Stirling FK8 1AQ), which lines up with the Old Stirling Bridge area. The tour description also points to Laurencecroft Road as the practical meet-up point, just steps from the bridge.
The session runs about 1 hour to 1 hour 15 minutes. That short window is ideal if you want a history hit without losing most of your day, but it also means the guide keeps things moving, so come ready with questions.
Because it is outdoors and weather-dependent, you’ll want to dress for wind and sudden changes. Even in cold or wet weather, you should expect standing pauses while you look at the ground and shoreline and follow the guide’s references.
Stop at Stirling Bridge: Wallace, Andrew de Moray, and the 1297 turning point
The heart of the tour is the Stirling Bridge stop. This is where you walk in the footsteps of William Wallace and Andrew De Moray and relive how the battle propelled them toward the vanguard of Scottish history.
The story is not just the day of the fight. The tour frames their early days and rise, then carries you through the moments that thrust them into the public eye, and finally toward their deaths and the legacy that followed. If your usual approach is dates and facts, you’ll still get those, but the tour aims to connect the dots between choices, leadership, and consequence.
You’ll also hear an entertaining bit of clarification: the tour even nods at the name Andy Murray to point you toward Andrew de Moray and the wider political structure around the Guardians of Scotland. It’s a light moment, but it helps the name stick and keeps the 1297 context clear.
Finding the original wooden bridge location, and why it’s harder than it sounds
Here’s the tricky part of Stirling Bridge: there is not a lot of surviving, obvious physical evidence to point at today. So the tour leans on interpretation and visual aids to show where the old wooden bridge from 1297 was believed to have been.
One guide uses a tablet to show details about the original bridge and the likely battlefield geography. Another approach includes references to a model of the original bridge, built to help explain how it may have worked in real life. The model has also been discussed alongside the idea that a modern structure is now part of the area’s flood defenses, which is useful context because it explains why the old bridge doesn’t simply sit there waiting for you.
During the walk, you should expect the guide to talk about where the old wooden bridge was located, and where it collapsed during the battle. Even if you cannot physically see the original structure, you can still follow the logic of the fight when you know what point the bridge enabled and what changed when it failed.
A different kind of day out in Scotland:
- Stirling Castle Whisky and The Kelpies Tour
★ 5.0 · 9 reviews - Private Stirling Old Town Tour
★ 5.0 · 8 reviews - Stirling Run Tour
★ 5.0 · 7 reviews - Private Tour of the Highlands, Glencoe and Castles from Stirling
★ 5.0 · 7 reviews
Standing on site without over-walking: what to expect physically
This is not a marathon style tour. There isn’t a lot of walking, but you will be standing for stretches while the guide explains positioning, movement, and why particular points mattered.
That’s actually a good fit for a lot of visitors. If you want to experience the battle grounds without covering a long route, this one keeps things compact. If you hate standing around, you might find it a bit slow, but most history walkers accept that this kind of local, on-site storytelling requires pauses.
If you can, wear shoes that handle uneven outdoor surfaces and bring a layer you can add or remove fast. The guides do talk even when the weather gets rough, so plan to be outdoors for the whole experience.
Small-group feel: how a 15-person cap changes the experience
A cap of 15 travelers matters more than it sounds. With a smaller group, you can ask questions and get answers tied to where you’re standing. That makes the battle geography feel less like a map reading exercise and more like a guided walk with checkpoints.
It also helps with pacing. The guide can slow down when you’re trying to understand where the wooden bridge was or why a particular claim sounds different from what you might have heard elsewhere. You’re not stuck waiting for the end of the tour to get clarity.
This is especially valuable for people who want more than a simplified outline. The guide approach here often includes sorting out what is likely, what is debated, and what is flat wrong, including issues tied to the way movies portray events.
Braveheart myths and the pleasure of correcting the record
The tour specifically aims to separate movie-style storytelling from the harder details of the real battle. If you’ve ever watched Braveheart and wondered what parts were dramatized, you’ll be in the right place.
You should expect the guide to call out common mis-tales and to explain why they don’t fit what’s known about Stirling Bridge. Even when your favorite scenes are left behind, there’s a satisfying payoff: the real story can feel more grounded and just as dramatic when you understand the stakes and setting.
This myth-correction is not about dunking on entertainment. It’s about giving you a clearer picture of Scottish independence history in a way you can carry home and share without second-guessing yourself.
Guides you might meet, and what their teaching style feels like
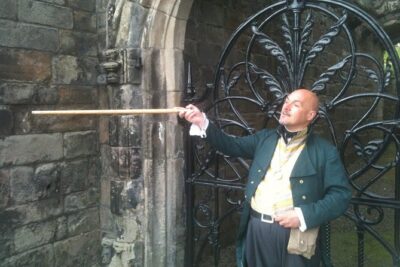
This tour appears to be led by local history storytellers, including guides named Steven and David in past departures. Both names show up in feedback, and the consistent theme is enthusiasm plus practical explanations on the spot.
One guide uses a tablet with details about the bridge area. Another has been connected with a model of the original bridge. That mix of tools matters because it turns an awkward situation, like trying to picture a vanished wooden structure, into something you can actually grasp in real time.
The best part is the tone. The guide style comes across as friendly and welcoming, not distant. That matters when you’re learning a battle story that can feel confusing if you try to figure it out alone.
Price and value: $34.45 for an on-site history session
At $34.45 per person, this tour sits in the low-to-mid range for a guided walk in the UK. The value comes from three things that add up fast.
First, you’re not paying for a museum ticket. The tour’s main stop is listed with an admission ticket as free, so you’re paying for the guide and the on-site interpretation rather than added entry fees.
Second, the time is efficient. One hour to one hour 15 minutes is long enough to learn a meaningful narrative, but short enough that it won’t derail your day. That’s a big deal in Stirling, where you may also be lining up other sites like Bannockburn or a castle visit.
Third, the group size keeps the teaching personal. In a small group, you get more direct attention per person. If history tours often feel like you’re watching from the back row, this format helps.
If you’re budget-aware, I’d treat this as a high-impact add-on that gives you context for the rest of your Stirling trip.
Pair it with Bannockburn, or use it as your Stirling anchor
If you’re visiting Stirling and also planning Bannockburn, this tour works as a strong opener. Stirling Bridge helps explain why the conflict matters before you move on to later battles.
Even if you skip Bannockburn, this one can still anchor your understanding. You get a focused story tied to a real location, and you leave with a mental map of where key events happened, including the vanished wooden bridge area.
Practical tip: plan a short rest before or after. You may be standing outdoors, and you’ll likely remember more if you’re not rushed immediately to the next stop.
Who should book this tour, and who might want a different option
You’ll love this tour if you want a battle story that is location-based and explanation-heavy. It’s ideal for people who enjoy Scottish history, want clarity around Wallace and Andrew de Moray, and prefer learning on-site rather than reading placards while walking at your own pace.
It’s also a good match if you like fact-checking your pop culture history. If you brought Braveheart expectations, the guide’s approach to myths is a real draw.
You might want to consider something else if you dislike standing for parts of the tour or if you expect lots of walking between multiple stops. This is compact, not sprawling, and the main value is what you learn while you’re there.
Service animals are allowed, and most people can participate, so it’s broadly approachable. Just remember it is outdoors and weather matters.
Should you book? My take
Book this tour if you want the Wars of Independence story told clearly at the exact spot where the battle shaped Scotland’s momentum. The small-group size, the on-site explanations, and the focus on Wallace and Andrew de Moray are the kind of combination that makes history feel real fast.
I’d also book it if you enjoy practical teaching aids, like tablets or models, that help you picture something that no longer exists. And if you’re carrying Braveheart assumptions, this tour is one of the better ways to update your understanding without turning your day into a full research project.
If you dislike outdoor standing or you’re visiting in bad weather, wait for a steadier forecast and pick a date when conditions are likely to be good.
FAQ
How long is the Braveheart (Battle of Stirling Bridge) Tour?
It runs about 1 hour to 1 hour 15 minutes.
What is the group size for this tour?
The tour has a maximum of 15 travelers.
Where does the tour meet?
The start point is Stirling Old Bridge, River Forth, Stirling FK8 1AQ, UK. The meet-up is also described as being just steps from Old Stirling Bridge near Laurencecroft Road.
What language is the tour offered in?
The tour is offered in English.
Is there an admission ticket for the main stop?
The tour information lists admission ticket as free for the Stirling Bridge stop.
Does the tour run in bad weather?
The experience requires good weather. If it is canceled due to poor weather, you’ll be offered a different date or a full refund.
What is the cancellation policy?
You can cancel up to 24 hours in advance for a full refund. If you cancel less than 24 hours before the start time, the amount you paid will not be refunded.
Newest reviews from Stirling
- Stirling Castle and the Secrets of the Old Town Private Tour★ 5.0 · 6 reviews
- The Stirling City & Beyond Bike Tour: Highlights & Hidden Gems★ 5.0 · 3 reviews
- Stirling Run Tour★ 5.0 · 7 reviews
- Private Tour of the Highlands, Glencoe and Castles from Stirling★ 5.0 · 7 reviews
- Private Stirling Old Town Tour★ 5.0 · 8 reviews
- Stirling Castle Whisky and The Kelpies Tour★ 5.0 · 9 reviews
- Bannockburn Battlefield Tour★ 5.0 · 36 reviews
- 3 Hour Private Tour of Stirling Old Town and Stirling Castle★ 5.0 · 17 reviews
Stirling Tours, compared.
Stirling Old Town Daily Walking Tour (11am & 2pm)
Read our review →
3 Hour Private Tour of Stirling Old Town and Stirling Castle
Read our review →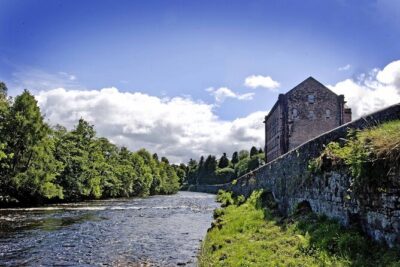
Private Tour of the Highlands, Glencoe and Castles from Stirling
Read our review →
Stirling Castle and the Secrets of the Old Town Private Tour
Read our review →Browse the lists this tour appears in